Wet-Forming a Leather Pencil Cup Without a Press Mold: DIY Guide
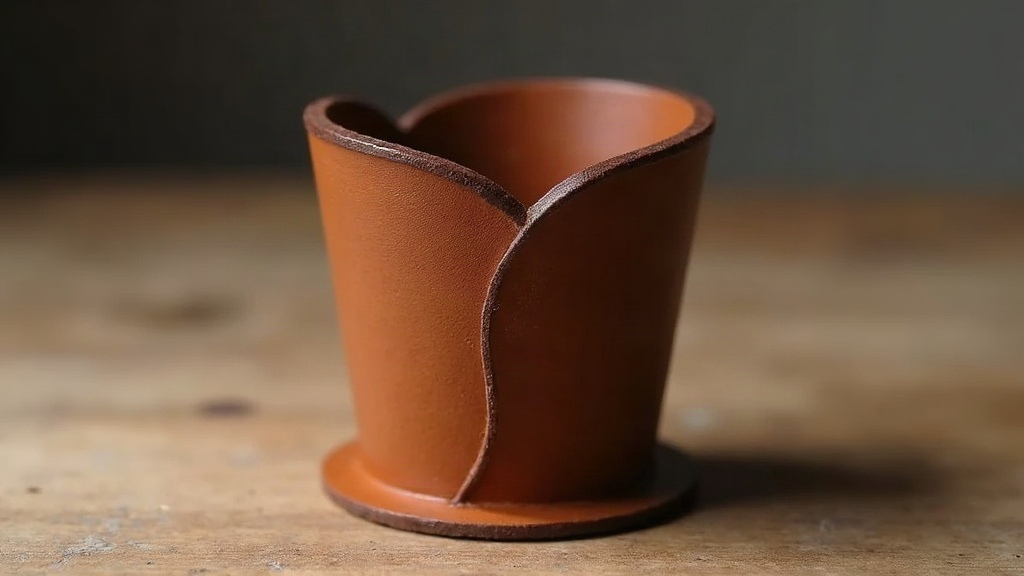
Wet-Forming a Leather Pencil Cup Without a Press Mold
You don’t need a press mold to wet-form a leather pencil cup. A jar, some warm water, and a bit of patience with your hands will get you there. The trick relies on leather’s split personality: it goes soft and pliable when wet, then locks into whatever shape it dries in. Shape a flat rectangle into a cylinder, add a base circle, and you’ve got a desk organizer sturdy enough to outlive your current job.
What Wet-Forming Actually Does to Leather
Wet-forming, sometimes called “molding” or “cupping,” only really works with vegetable-tanned leather. It drinks water evenly and keeps whatever shape you give it once it dries. Chrome-tanned leather, on the other hand, is basically water-resistant and will just spring back to flat the moment you let go. Don’t bother trying it for this.
Here’s the mechanism: soak veg-tan leather and the fibers swell up and loosen their grip on each other. Stretch the leather around a form while it’s in that relaxed state, let it dry, and the fibers re-lock in the new position. A press mold just speeds things along and gives you crisper corners. For a pencil cup, though, a glass jar, a tin can, or a scrap of PVC pipe combined with hand shaping gets the job done just fine.
Tools and Materials You Need
- 5–6 oz vegetable-tanned leather (roughly 1.5–2 mm thick; go thinner and it flops around, go thicker and your hands will hate you)
- A cylindrical form, something like a clean glass jar, an empty can, or a 3-inch PVC pipe, close to your cup’s inside diameter
- Warm water (around 100–120°F / 38–49°C)
- A bowl or tray for soaking
- A sharp knife or rotary cutter plus a cutting mat
- A metal ruler and a compass or round template for the base
- Edge beveler, sandpaper, and a burnisher for finishing
- Waxed thread and stitching chisels, or rivets/Chicago screws, for putting it together
- A towel and a bone folder (or a smooth wooden dowel in a pinch) for smoothing things out
Step 1: Cut the Pattern
You need two pieces:
- Wall: a rectangle. Length equals the cup’s circumference plus about 10 mm for the overlap seam; height equals your target cup height plus 10 mm. Making a 3-inch (76 mm) cup that stands 7.5 inches (190 mm) tall? Cut your wall at roughly 9.8 x 7.5 inches (250 x 190 mm).
- Base: a circle matching the cup’s inside diameter, plus extra if you’re planning to stitch it in rather than just glue it.
Cut a little big on purpose. Trimming after forming is easy; adding leather back is not a thing that exists.
Step 2: Wet the Leather Correctly
Drop both pieces into the warm water. Little bubbles will rise off the surface, and once they stop, the leather’s fully saturated. For 5–6 oz leather that’s usually 1 to 3 minutes, not long at all.
Now comes the part everyone rushes and shouldn’t: letting it “case.” Pull the leather out, blot off the surface water with a towel, and set it aside for 10 to 15 minutes. You’re waiting for the color to come back to normal while the leather still feels cool and bendy to the touch. Too wet and it turns mushy, picks up every fingerprint and mark. Too dry and it cracks the second you try to fold it. There’s a sweet spot, and you’ll feel it once you’ve done it a couple times.
Step 3: Form the Wall Around Your Cylinder
- Wrap the damp wall piece around your jar or pipe.
- Overlap the short ends where the stitching or rivets will go.
- Press and work the leather against the form with your thumbs, chasing out any air gaps, using a bone folder where your fingers can’t reach well enough.
- Hold it in place somehow, rubber bands, spring clamps, even a strip of cloth tied tight all work.
- Let the wall dry partway, 30 to 60 minutes, while you turn your attention to the base.
Step 4: Hand-Shape the Base (“Cupping”)
This step is basically your stand-in for the press mold. If you just want a flat-bottomed cup, glue or stitch a flat circle inside the wall and call it done. But if you want it to look a bit more finished, try cupping the base by hand:
- Lay the wet base circle over the end of your jar, centered up.
- Pull the edges down around the rim evenly, using a circular motion with your fingers so it settles into a shallow dish shape.
- Work the folds with a bone folder, slow and even, nothing rushed. Rush this and you’ll end up with hard creases that never go away.
- Let the dish dry partially on the form before you move to assembly.
A shallow lip, 5 to 10 mm, tucks neatly inside the wall and hides the seam almost completely.
Step 5: Assemble and Dry
Stitch or rivet the wall’s overlap seam first, then attach the base. Punching holes while the leather’s still damp makes life much easier than trying to force an awl through dry, stiff leather later. Saddle stitching works well, or go with two rows of rivets if you want a more rugged, industrial look.
Put the assembled cup back on the form and give it 12 to 24 hours to dry completely, somewhere cool and ventilated. Keep it away from direct sun and heaters. Fast drying dries the surface before the inside catches up, and that’s a recipe for warping.
Step 6: Finish and Protect
Once it’s bone-dry, the shape is locked in for good. From here:
- Trim any uneven edges with a knife
- Bevel and sand the top and bottom edges
- Burnish the edges with water and a wooden slicker
- Rub in a light coat of leather balm, neatsfoot oil, or beeswax to seal it up and give it some sheen
Common Mistakes to Avoid
- Skipping the casing step. This alone causes most of the cracked, warped cups people end up tossing.
- Cutting to exact measurements. Wet leather stretches under your hands; give yourself room and trim after.
- Forcing sharp folds into a wet base. Ease the curve in gradually, or you’ll bake in crease lines that never smooth out.
- Rushing the drying. Slow and steady is what actually locks the shape in place without warping.
Conclusion
Wet-forming a leather pencil cup without a press mold is one of those projects that feels like a small cheat code: cheap, satisfying, and proof you don’t need fancy equipment to shape leather properly. A jar, some warm water, a careful casing step, and a little hand-shaping patience turn a flat rectangle and circle into a cup that’ll sit on your desk for years, long after any plastic version has cracked and gone in the bin.