Custom Molded Leather Holster for a Hand Trowel or Shears
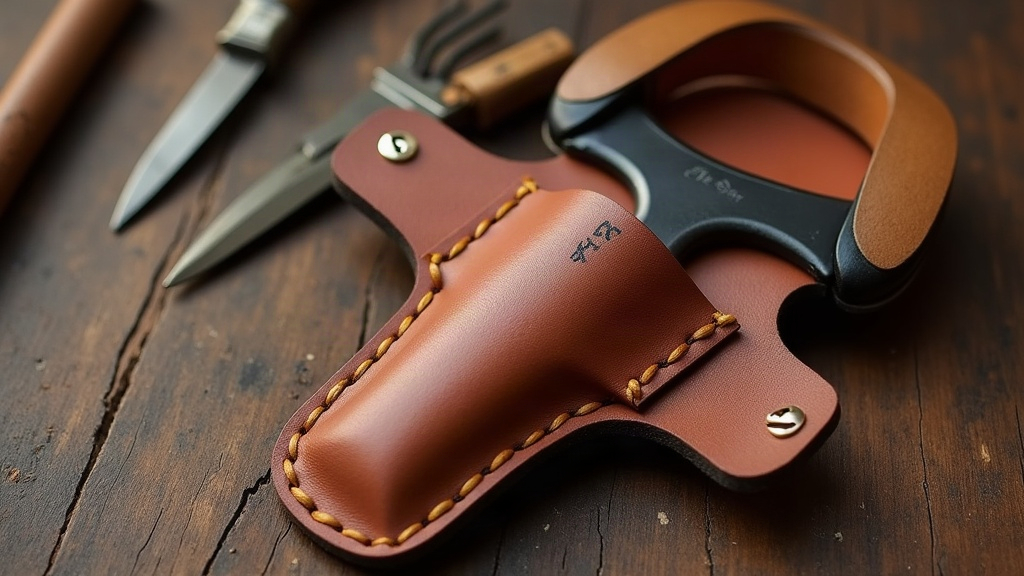
A custom molded leather holster keeps your hand trowel or garden shears secure, protected, and ready to grab the second you step outside. Unlike a flat sewn sheath, a wet-molded holster forms a snug, body-hugging shape around the exact tool you use. It holds those contours for good and won’t loosen up after a season of use. This guide walks through the whole process, from pattern to finished, oiled holster, using tools and materials most hobbyist leatherworkers already have lying around the shop.
Why Mold Instead of Sew a Flat Sheath
A flat sheath depends on stitching and straps to keep a tool from falling out. A molded holster uses the leather itself as the retention mechanism:
- Precision fit. The leather hardens around the trowel’s blade or the shears’ handles, creating a friction-fit grip with no snaps needed.
- Durability. Vegetable-tanned leather turns rigid once it dries, standing up to dirt, moisture, and the constant rubbing of a metal blade.
- Better aesthetics. Molded pieces look like something you’d buy from a craftsman, not a kit, with the tool’s shape visible right in the leather.
Materials and Tools You’ll Need
- 7-9 oz vegetable-tanned leather (thinner stock molds easier; thicker stock holds up longer)
- The actual tool you’re building the holster for (you really can’t fake this part)
- A mold form: a wood block, a length of PVC pipe, or just the tool itself wrapped in plastic
- Rawhide mallet, plus a modeling or stylus tool for detail work
- Rivets, snaps, or waxed thread and stitching chisels
- A tub of lukewarm water
- Leather conditioner or neatsfoot oil, plus edge finish or beeswax
- Belt loop hardware (Chicago screws or a leather belt loop)
Step 1: Create the Pattern
Lay the trowel or shears flat on a sheet of paper and trace around it, leaving about a half-inch of clearance on each side to account for leather thickness and stitching. If you’re working with shears, mold only around the closed blade section. The handles should stay exposed so you can grab them without fumbling. Cut two panels: a back panel (taller, since it carries the belt attachment) and a front panel shaped to the tool’s outline.
Step 2: Wet-Mold the Front Panel
- Submerge the front panel in lukewarm water for 30 to 90 seconds, just until it turns pliable without getting waterlogged.
- Wrap the tool’s business end in plastic wrap so the metal doesn’t take on water damage.
- Press the wet leather over the tool, working it into every curve and edge with your fingers and a modeling tool.
- Tap the leather tight against blade edges or ferrule lines with the rawhide mallet to get crisp, defined detail.
- Let it dry fully on the mold. Plan on 12 to 24 hours at room temperature. Don’t rush this with a heat gun or hair dryer; forced drying cracks and warps the leather.
Step 3: Assemble the Holster
Once the molded front panel is bone-dry, pull the tool out and trim any excess leather with a sharp utility knife. Mark your stitch lines about 3/16 inch from the edge, punch holes with a diamond chisel, and hand-stitch the front panel to the back panel using a saddle stitch, it’s the strongest option for something that’ll take daily abuse. Leave the top open for the tool to slide in and out. For trowels, it’s worth leaving a small drainage gap at the bottom so soil and water don’t pool inside.
Step 4: Add Belt Attachment and Retention
Rivet or screw (Chicago screws work well) a belt loop onto the back panel. These hold up better under weight than stitching alone. For shears, add a small leather strap with a snap over the handles for extra security when you’re bending, kneeling, or moving around the yard. Trowels usually don’t need this; the molded fit alone keeps them put.
Step 5: Condition and Seal
Rub in a leather conditioner or neatsfoot oil to bring back the flexibility the leather lost during wet-molding, and to boost water resistance. Garden holsters see a lot more moisture than your average wallet or belt, so don’t skip this. Finish the raw edges with beeswax or edge paint, then burnish with a canvas cloth until they’re smooth and clean-looking.
Common Mistakes to Avoid
- Using chrome-tanned leather. It simply won’t hold a mold shape. Stick with veg-tan, no exceptions.
- Over-soaking the leather. Too much water weakens the fibers and can make the dye bleed out.
- Skipping the plastic wrap. An unprotected metal blade left sitting in wet leather will start rusting fast.
- Molding too tightly around moving parts. Shears need room to open and close without catching on the leather.
Conclusion
A custom molded leather holster turns a plain trowel or a pair of shears into a piece of gear built just for them. With a hide of veg-tan leather, a tub of water, and a handful of basic tools, you can make something that fits better than anything you’d find on a shelf, and one that only gets better looking the more you use it.